Multi-wall polycarbonate sheets are a strong and appealing option for a range of roofing and glazing applications, but they do require some care and attention during installation to maintain their appearance and performance. To get the most out of your polycarbonate project, you’ll want to follow a few simple installation rules to ensure you achieve the desired look while also protecting the product’s long-term functionality. Here are a few pointers to consider before you begin.
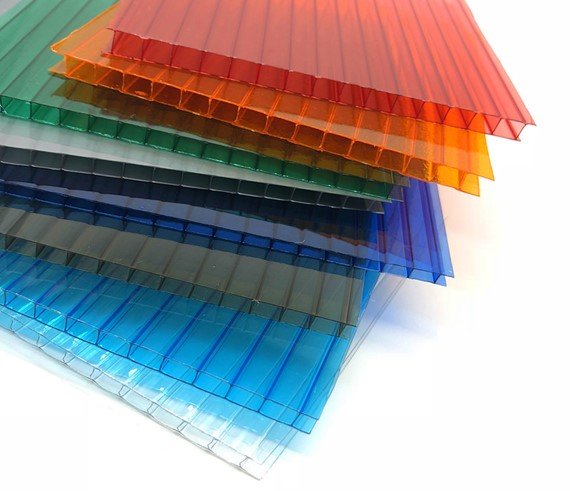
- The majority of multi-wall polycarbonate sheets come standard with a UV coating on one side to protect the panel from fading or discoloration caused by the sun. When placing the panels, ensure that the UV coating is facing outward. If the panels are installed with the coating side facing in, they will be unprotected.
- For window and wall constructions, align the ribs of each sheet vertically; for roofing structures, align them parallel to the direction of rain flow. Certain manufacturers recommend drilling weep holes in the U-shaped finishing profiles at the bottom of the panels to allow moisture to exit the channels of the multi-wall structure naturally via gravity.
- During installation, the protective film on each sheet should remain in place; however, you do not want to trap the film beneath screws and other finishing hardware. To avoid this, partially peel back the protective film from the top and bottom of the panels before installation, allowing you to attach them while still removing the coating neatly.
- Once the sheet is securely attached in place and the installation is complete, remove the protective covering. Leaving the film in place after installation may cause it to bake to the surface under high temperatures and bright sunlight, rendering it unremovable.
- Ensure that the ends of the sheets are covered throughout the installation process to prevent dust and debris from entering the channels inside the multi-wall structure. If the material does become trapped within, it should be removed using compressed air. Cleaning the flutes with compressed air is also advised following the installation of the panels and immediately before attaching the end profiles.
- Trim your multi-wall panels using only certified cutting tools. Circular saws with fine teeth, jigsaws, table saws, and hand saws are all examples of these. When working with thinner sheets, a utility knife, heavy-duty scissors, or tin snips may also be used. Simply ensure that the blade is sharp to achieve a lovely, clean edge. Additionally, polycarbonate sheets can be drilled using a power drill. (Liquid cooling is not required and is generally discouraged.) Ensure that no hole is drilled less than 12 inches from the edge.
- Double-check your measurements before cutting, and remember to account for thermal expansion. Consult the manufacturer for the most precise thermal expansion rate for the product in question. If you believe your project will require sealant, contact the manufacturer to see whether sealants are compatible with your polycarbonate product.
- Use U-profiles or aluminum tape to seal the sheet ends to prevent dust and debris from entering the multi-wall channels.
The Proper Installation of Polycarbonate Roofing Sheets
After conducting all necessary research and preparation, and receiving your polycarbonate sheets, it’s time to go to work!
Sheets for Laying and Glazing Bars
Laying the sheets and glazing bars correctly is critical to ensuring that your sheets fit snugly against the framework, with no gaps or unevenness. While it may be tempting to skip this step because you should have already measured the area and sheets, you don’t want to be caught off guard midway through sheet repair!
Additionally, you may use this time to ensure that your sheets are as robust as they should be. Polycarbonate sheets are preferred due to their excellent impact resistance, albeit this is only useful when the panels are installed properly on the roof. This holds for your roof’s ability to withstand water during storms and showers.
How to Install Polycarbonate Roofing Sheets
Now is the moment to begin properly repairing your sheets. However, before we get to the sheets, it’s prudent, to begin with, the glazing bars.
- Glazing bars should be installed along the roof’s perimeter, with holes spaced approximately 500mm apart. Then, using these holes, insert your fixings and securely fasten your bars in preparation for the sheets.
- Eaves fillers are required on the majority of roofs, and yours should be applied at this point in the procedure. After that, you may begin attaching your sheets, beginning with one to the glazing bar on one end of the roof. After that, you can arrange your sheets on the roof in preparation for fixing.
- A glazing bar should be connected between each sheet to assist in adequately sealing any gaps between them. After aligning the sheets on your roof and attaching them to the bars, you can complete the installation by adding the screw caps and screws, resulting in a secure, durable fit.
- At this point, you can remove any protective film from the sheets and begin drilling holes and adding screws and/or attaching buttons to reinforce your polycarbonate roof.
- There are numerous more things you can do to improve the effectiveness of your roof, such as adding flashing where your roof meets another wall.