
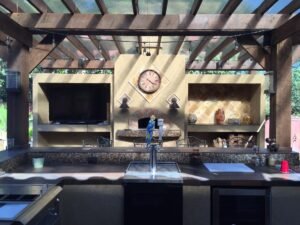
An area connecting a home to the exterior and mostly is paved is called as the patio. It gives shade from sun and rain and a style statement to your home, backyard or garden
The patio covers well-defined single-story constructions. They are equal to or less than 12 feet long and are mainly used outside of the house. They don’t even need a building permit if they don’t have a roof. There are so many patio kits available to install your patio covers yourself to spend a joyful time with your loved ones ad for a beautiful addition to your home. Always choose the installation kits with the easiest instructions to make the time enjoyable and not a burden.
DO IT YOURSELF or DIY patio cover kits:
Aluminum kits are the most versatile ones. They can be brought by giving precise details about your patio cover imaginations. The kits can be customized. You can add architectural supports, different pillars ad beams, fans, decorative lights, different patterns, designs and also skylights to enjoy soft and natural sunlight etc.
Things to consider:
The correctly installed patio cover will last for many years to bring beauty and joy at the same time. Always consult the technical team or professional before starting the process. It will clear your many doubt and help you during installation. They will also guide you that whether you need a building permit or not. You can also connect with your local law enforcement department to check on that.
Always choose a kit with enough required courage. Keep your measurement up to the point. Consider a somehow larger, but not too large required cover to avoid getting less shade and improper connection with your house. Choose a color matching the exterior of your house. Colors like black, white or brown are also a classy and modern choice. Check the weather condition of your outdoors to decide whether you have to add a ceiling fan or not. Always clear your doubts and ask questions from the seller if you have any. Take all these decisions considering the space in your home where you want to install the patio cover.

DIY patio cover kit installation:
after you get your desired patio cover kit, get started on the process of installation. Let’s take a look at the installation process in detail.
- Gather all the parts and tools present in the kit and read all the instructions given in the guide manual of the kit.
- Keep all the parts assembled at the place of installation.
- Measure and record the width and height of your installation area to make a rough draft of the area covered by the patio.
- Cut the C-channel from the kit via a miter saw after measuring it to the exact required length.
- Four inches from the endpoint of the cut C-channel, drill the first hole carefully.
- Repeat this process at the other end
- By following the same procedure, drill holes into the C-channel into the length of 12 inches.
- Using the solar seal present in the installation kit, close the back of your C-channel
- Generously use the solar seal to make it protected against water diffusion
- After that, secure and attach your C-channel to the structure using the long tip present on the top.
- Join them with the wall with the help of the given 1/4 inch tapcon screws.
- Use a hammer drill containing ¼ concrete drill to get the perfect outcome.
- Now apply a second layer of the seal on the outside to protect the attachment between C-channel and the wall.
- Now it’s time to build the frame of the patio cover
- Now get your beams and posts.
- Place them onto the ground in the exact design and pattern you want them to build
- Give enough space between each for attachments and joints
- Cut exactly 2 inches of every beam. This will give one inch on every side of the beam for the front part
- Spot the end of post position on each beam.
- This will result in an extension of about 12 inches on each side
- Attach your beam into the posts.
- Find the center of the insertion
- Mark these holes to insert the 3/8 hex bolts.
- To insert those bolts, make about 3/8 holes by drilling on each post and screw the hex bolts in
- Now also mark the point of meeting of two endpoints.
- This will give a 1 to 2 inch extension onto each side.
- Now the third step is the installation of panels
- Install the first above panel by taking into consideration the female or patterned side facing outside.
- You may need external help for this step because the above panels are high from the ground.
- Shove the panel under the longer lip and keep shoving until it gets ratioed to the wall and seems set.
- Tighten every panel with a tek screw number 12 by screwing them onto at 12 inches from the edge of each side.
- Keep repeating the process there is an 11-inch gap between every tek screw and then repeat the same process from the panel top.
- Now attach your beam to the outer verge of the panel.
- Screw them by using the designated tek screws on every end of the panel
- Always level and balance the panel and beam before making it secure with screws.
- Now repeat the same process with every panel and beam separately.
- Make sure they all are on the level with each other before connecting them to the post.
- Cut the make side before the final attachment of the last panel to the post by a grinder to make it even and smooth.
- After everything is installed, cut the angle brackets by using an aluminum drill.
- Cut two holes on top and bottom of each bracket of about 3/8 size.
- By using the same aluminum drill, attach these angle brackets to each side of the post.
- Make sure everything is even and on a level with your house, roof and bottom.
- The front part for each side of the cover is also included in the kit
- Using the E-gutter and the front part cover, tightly seal and secure your roof and joints. This will prevent any water diffusion on the patio.
And just like this, the DIY installation of your patio covers is complete. Do-it-yourself kits indeed make tasks easier.
#Patio
#Polycarbonates
#Patio covers
#Polycarbonate sheets